2021年9月30日星期四

How to Update the wiADVISOR microPod

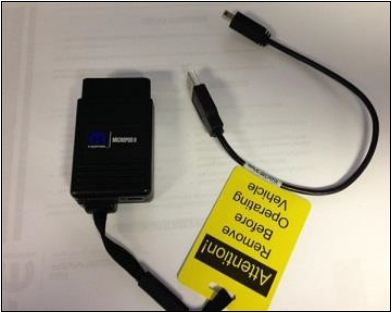
In order to ensure the wiTech MicroPod 2 is working properly, it will be necessary to update it based on the latest software releases provided by Chrysler. If your microPod is at version 0.4.2, it will not communicate with wiADVISOR. You must perform  an update to version  1.2.2  using  the USB cable that came with the microPod (see below).

How-to-Update-the-wiADVISOR-microPod-1

To update your microPod using the USB cable:

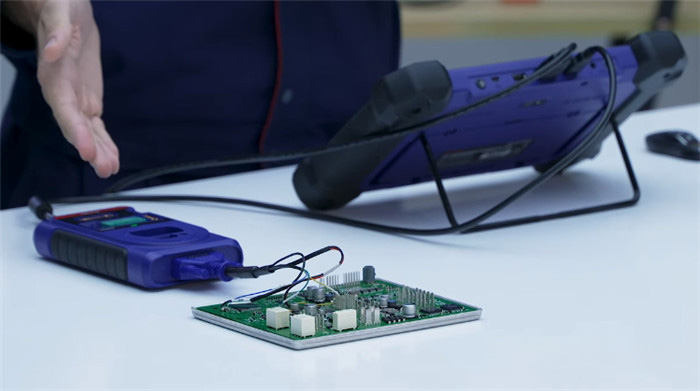
1.Connect the large end of the USB cable to a computer that has the wiTECH Diagnostic Application already installed – Typically this is a computer in the shop.

How-to-Update-the-wiADVISOR-microPod-2

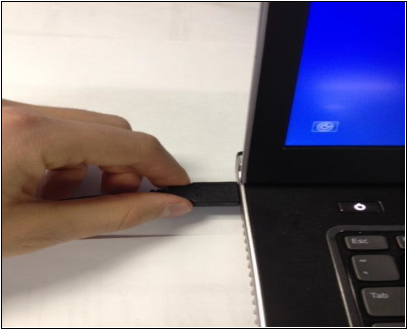
2.Connect the small end of the USB cable to the microPod as shown below:

How-to-Update-the-wiADVISOR-microPod-3

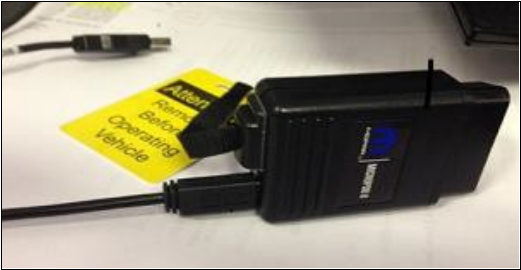
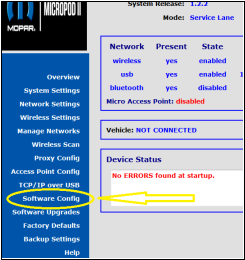
3.Once the microPod is connected via USB, a green light will come on. Open your Internet browser and type the IP address 172.22.22.22 in the address bar at the top of your browser and hit Enter on your keyboard. The microPod interface will come up as shown Below:

How-to-Update-the-wiADVISOR-microPod-4

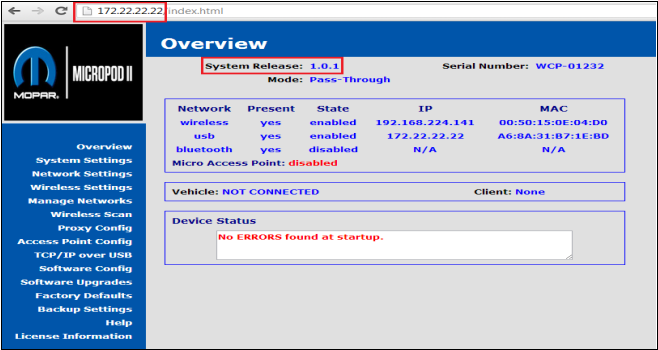
a.If the System Release shows any version besides 1.2.2 (red box on image above), then your microPod should update to the most current version if the wireless connection on the microPod is properly configured.

-OR-

b.If the System Release version shows 0.4.2, the wireless connection on the microPod must be configured in order for the microPod to update.

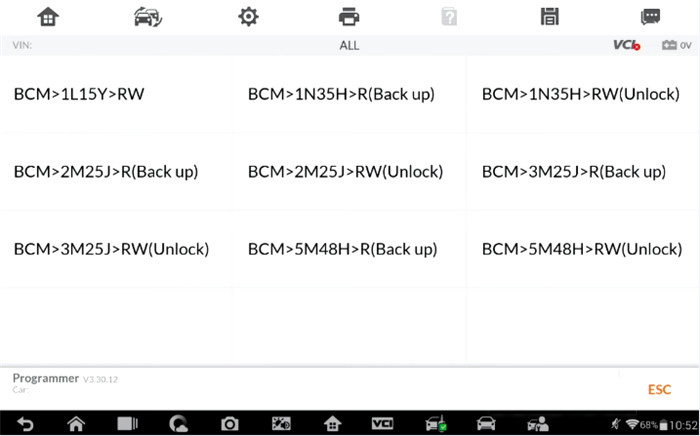
Once wireless is configured, simply wait until the light on the Auto Scanner Tool microPod will begin to flash with slow bursts of red indicating that the microPod has started the update process. You will not be able to access the microPod during the update and will have  to wait 4-6 minutes before it finishes. The flashing red light will return to green once the update is complete.

4.NEXT: Click on ‘Software Config’ (left side):

How-to-Update-the-wiADVISOR-microPod-5
a.If the wiADVISOR version is 1.1.6, this needs an update. See below:

How-to-Update-the-wiADVISOR-microPod-6

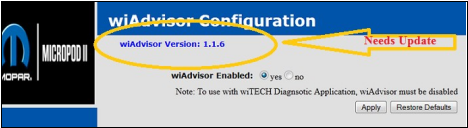
b.To update the App Version to 1.1.9, simply leave the microPod plugged into the PC. Pod will update itself. Refresh the screen until the version shows 1.1.9.

5.Now that your microPod System Release shows version 1.2.2, and the software shows an App version of 1.1.9, your microPod is now up-to-date.

Determining the Status of your microPod:

If you are not sure if your microPod requires an update, follow the below steps to confirm  this. To view the current status of your microPod, you must be logged into  the wiADVISOR  application and have selected “Vehicle Queue” in the interface. When a  microPod is  powered up, the software status will be displayed along with connected vehicle information.

1.microPod Status Types – There are three types of update statuses available for the microPod:

a.Up-to-date – This status indicates that your microPod is up-to-date and no  further action is required at this time. If the software is up-to-date, no  status information will be displayed. Otherwise one of the following two scenarios will be shown.

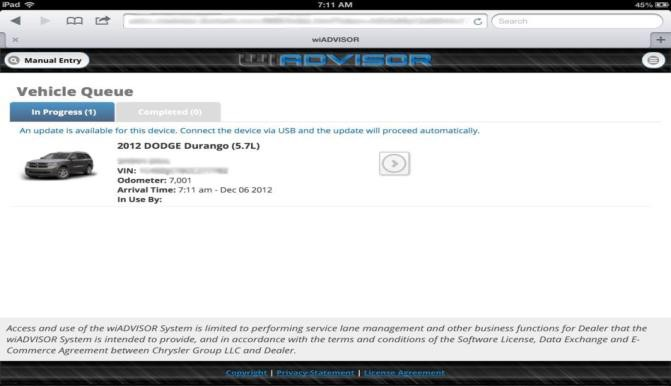
b.Update Available – This status indicates that there is an update  available for your microPod.  It is highly recommended that you update your microPod at your earliest convenience. You may continue to use the microPod without updating it when this status appears.

How-to-Update-the-wiADVISOR-microPod-7

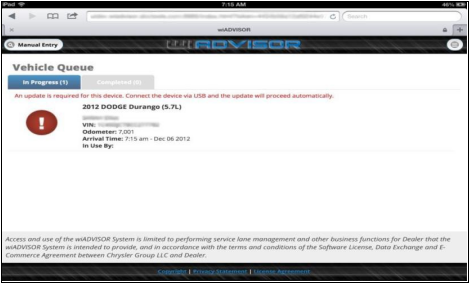
c.Update Required – This status indicates that an update is required on the microPod in order  to continue using it.

How-to-Update-the-wiADVISOR-microPod-8

2.To update the software, disconnect the microPod from the vehicle and connect it to your computer using the USB cable (computer must have the wiTECH Diagnostic Application installed).

3.Since your microPod is updated to the 1.2.2 System Release; once booted and no vehicle power is detected, the microPod will automatically begin the update process. Depending  on what software is being updated, the process can take anywhere from a few seconds to several minutes.  During this  time  the  LED  lights will blink red and off.  Monitor the Vehicle Queue to determine if the update has completed. Disconnecting the USB  cable prior to update completion may leave the microPod in an irrecoverable failure state.

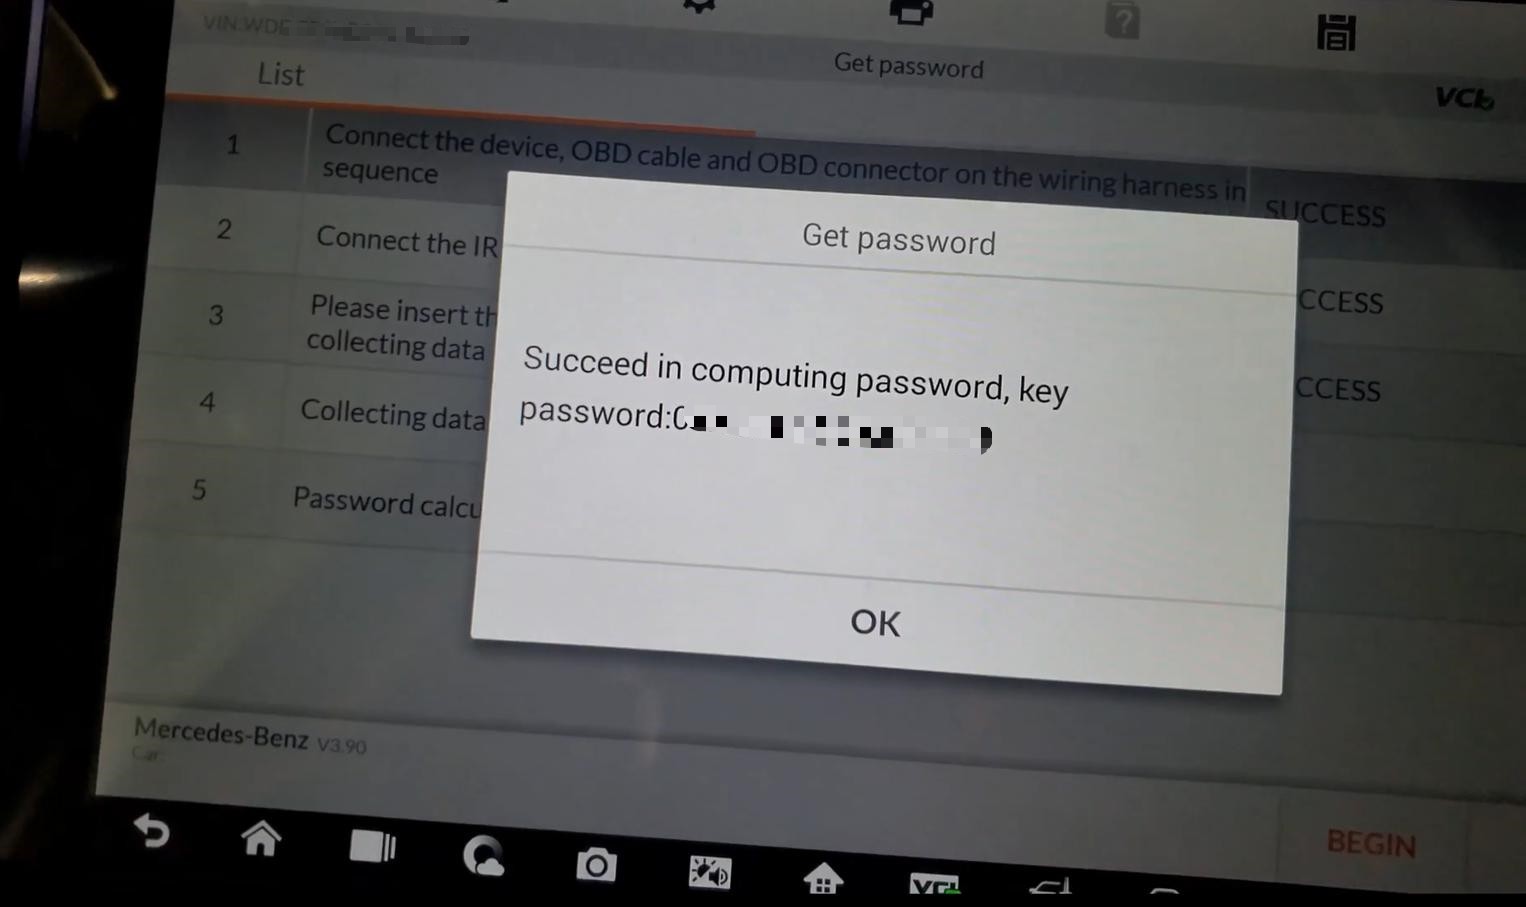
After powering up with the USB cable, the screen will warn you that the update is starting and you must not unplug the device until the update is complete (see below).
How-to-Update-the-wiADVISOR-microPod-9

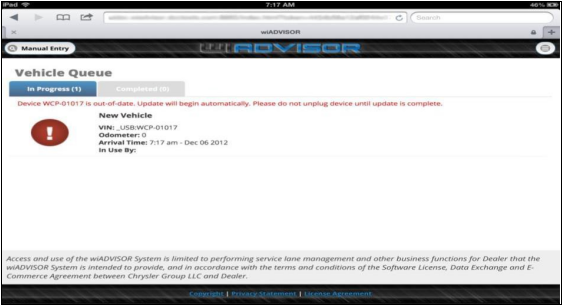
4.When the update is completed, the text in the Vehicle Queue will change indicating that microPod is up-to-date.  At this time, it is safe to disconnect the USB cable and re-connect   to a vehicle.

Troubleshooting Tips:

If you find that you are having issues with updating your wiADVISOR microPod there are few resolutions you can try.
1.Make sure you have wiTECH installed on the computer. (The microPod needs the wiTECH drivers in order to connect to the PC)
2.Try a different USB to mini USB cable.
3.Unplug the cable from the PC and try a different USB port.
4.Try a different PC; make sure you are in range of the wiADVISOR Access Point.

If you have any questions or concerns, please contact us via email at sales@obd2tool.com.


https://chryslertroublerepair.blogspot.com/2021/08/how-to-update-wiadvisor-micropod.html

VXDIAG Benz C6 2021.6 VCI Multiplexer Failed Solution

 he problem goes like this:  I just try to read fault codes with Vxdiag Benz C6 new 6-2021 xentry version, but the VCI can’t make connection to car (W212).

Opens normally and start making connection, popup says VCI available But when starting diagnosis don’t connect, comes initialization of multiplexer failed fault info screen. See pic attached

VXDIAG-Benz-C6-2021.6-VCI-Multiplexer-Failed-Solution

VX Manager seems good, and I have update VCI and make reconnecting, nothing don’t help.

Obd2tool.com working solution:

The problem can be solved by installing the new patch.

Download Xentry Patch 2021.06.exe within the VCI client here

https://mega.nz/folder/FYl0RKRL#JHZETHntbTflzNWfFr9NMw

Feedback:

I made that. Now it works. Thank you.

2021年9月15日星期三

Autel IM608 Repeats EIS Prompt for Benz W220 Password Reading


One user gave a feedback that during the password calculation process of Autel MaxiIM IM608 it’s asking him to insert the key into the EIS for 10 seconds. What puzzles him is that the prompt displays almost every minute until the calculation success.
autel-im608-repeats-eis-prompt-for-benz-w220-password-reading-1

He’d done Benz key programming for several times but never had this happen before, and this time the car is Benz W220 2003. After repeating the step for many times, finally he got the password.

Besides, this issue happens on others as well. They said they’ve done this about 12 or 15 times to get the password and it’s normal to work on old Benz models.

Possible reason and solution:

Here our technical support believed that because of the old model the transmission signals of the EIS that turns rusty weakens. So they’d better try more time as the prompt.

In addition, our technical support prompts that there are three modes to calculate the Benz password by Autel MaxiIM IM608: On Vehicle, On bench(G-Box) and On bench. So make sure the connections are correct as the prompts and diagrams of different modes. For instance, On Vehicle mode often requires a bypass; Care the connections when Autel G-Box2 Adapter is needed, etc.

autel-im608-repeats-eis-prompt-for-benz-w220-password-reading-2

Therefore, the prompt “Insert the ignition key into the EIS and wait for 10s” is normal, just follow the prompts and finally it will give you the password.

autel-im608-repeats-eis-prompt-for-benz-w220-password-reading-3

Done!

Porsche EEPROM Programming with Autel IM608 Pro


Autel IM608 Pro is not only an on-vehicle programmer but also an EEPROM programmer. One tablet supports multiple ways to replace car keys, which can efficiently support your repair works. This post will show you that how to use it to program EEPROM on a Porsche.

EEPROM is hard to navigate. There are two scenarios for using EEPROM.

*   One is if you want to add a new key using certain vehicles like BMW, AUDI and Porsche.
*   Another is if you replace an ECU like the engine and need to read the old unit’s info.

It’s easy to program a Porsche key using Autel IM608 Pro and D flash. That means we will read the data from a chip.

Procedures:
First, take out the chipset from the immobilizer system
We need to read info from the chipset by connecting it with XP400 Pro key programmer.
Make sure you’re connected to the key programmer and the programmer is connected to the IM608 Pro tablet.

Porsche-EEPROM-Programming-with-Autel-IM608-Pro-1

Next, go to learn key for Porsche.
Select Programmer>> Accept the disclaimer>> Chip (EEPROM, MCU, ECU)>> Chip read& write>> Immobilizer>> PORSCHE>> BCM>5M48H>R (Back up)

Porsche-EEPROM-Programming-with-Autel-IM608-Pro-2

Read the operation guide and helpful information carefully

Porsche-EEPROM-Programming-with-Autel-IM608-Pro-3
Since we’re reading data, we need to select “D- FLASH”
Then we can view the schematic diagram

Porsche-EEPROM-Programming-with-Autel-IM608-Pro-4

Zoom in on the schematic diagram and study it closely to find the correct places to connect the wires.
Then follow the on-screen instructions to do

Porsche-EEPROM-Programming-with-Autel-IM608-Pro-5

You need to cut a line in one spot and remove two other parts, then connect the wires accordingly. They are color coded and labeled to help you out.

Once the wires are connected, go back and select read, this will read the info from the ECU and record it in the tablet. We will use the info to learn a new key.

When the data has been read out, save the file into a new folder and call it whatever you want (such as porscheeeprom11).

After that, exit and go back to the home screen and select immobilizer function.
Select Porsche or auto scan the VIN
Select Expert Mode>> New Porsche

Porsche-EEPROM-Programming-with-Autel-IM608-Pro-6

1.Load EEPROM data
Find the BCM type located on the chipset, then go into the programmer file and find your file porscheeeprom.

Porsche-EEPROM-Programming-with-Autel-IM608-Pro-7

It’s beneficial for you at this point to take a picture of the info. Just in case it doesn’t load in the future.

Porsche-EEPROM-Programming-with-Autel-IM608-Pro-8

2.Make dealer key
Put a blank key into the Autel XP400 Pro key programmer, then select make dealer key

Porsche-EEPROM-Programming-with-Autel-IM608-Pro-10

Once make dealer key is successful, move on to key learning process.

Porsche-EEPROM-Programming-with-Autel-IM608-Pro-11

3.Learn key
You need to connect your JVCI into the OBD2 port and learn the key
Make sure a skilled professional is performing the EEPROM process.

Done!

That’s the whole process to program new key to Porsche with Autel IM608 Pro with XP400 Pro.